▷Expert Advice for Installing a Stunning Tile Backsplash In San Diego

Expert Advice for Installing a Stunning Tile Backsplash In San Diego
Looking to revamp your kitchen? Installing a new backsplash can instantly transform the space. But where to start? We’ve got you covered with five expert tips to make the process a breeze. Say goodbye to outdated tiles and hello to a fresh, modern look. From choosing the right materials to nailing the installation, we’ll guide you every step of the way. Ready to elevate your kitchen’s style?
Measure and Plan
Measure Wall Area
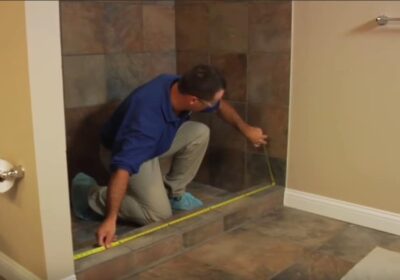
Start by measuring the length and height of the wall area where you plan to install the backsplash. Use a tape measure for accurate measurements.
To calculate the square footage, multiply the length by the height. This will help you determine how much tile you need.
Plan Tile Layout
Create a rough sketch of your wall area and mark any obstacles like outlets or switches. Plan where to start tiling for a visually appealing layout.
Consider using a centerline as a guide to ensure symmetry. This step is crucial for achieving a professional-looking finish.
Choose Tile Style
Select a tile style that complements your kitchen decor. Whether it’s subway tiles, mosaic patterns, or bold colors, choose a design that suits your taste.
Ensure the tile material is suitable for a kitchen backsplash, such as ceramic, glass, or stainless steel.
Gather Tools
Before starting the installation process, gather all the necessary tools. These may include tile adhesive, spacers, grout, a trowel, tile cutter, and a level.
Having the right tools on hand will make the installation smoother and more efficient.
Prepare the Wall
Clean Wall Surface
To start, clean the wall surface thoroughly with a mixture of water and mild detergent. Scrub off any dirt or grease to ensure a smooth application.
Repair Any Damage
Inspect the wall for any damage such as cracks or holes. Fill these imperfections with spackling compound and sand them down until the surface is even.
Apply Backer Board
Next, install a backer board onto the wall using screws. This will provide a sturdy base for the new backsplash tiles to adhere to securely.
Mark Guidelines
Use a level and pencil to mark guidelines on the wall where the tiles will be placed. This step ensures a straight and symmetrical layout for your new kitchen backsplash.
Cut and Pre-Lay Tile
Measure and Mark Tiles
Start by measuring the area where you’ll install the backsplash. Mark the measurements on the tiles accurately.
Cut Tiles to Fit
Use a tile cutter or a wet saw to cut the tiles according to your measurements. Ensure precise cuts for a seamless fit.
Pre-Lay Tiles on Wall
Before applying adhesive, lay the tiles on the wall to visualize the layout. Make any necessary adjustments.
Adjust Tile Spacing
Place spacers between the tiles for even spacing. Check alignment and adjust as needed for a professional finish.
Apply Mortar and Lay Tiles
Mix Mortar Properly
Start by mixing mortar according to the manufacturer’s instructions for the correct consistency and adhesion. Use a trowel for an even mix.
To ensure a strong bond, mix mortar until it has a thick, peanut butter-like consistency. This will help the tiles adhere properly.
Apply Mortar Evenly
Spread a layer of mortar on the backsplash area using the flat side of the trowel. Ensure an even coat for proper tile adhesion.
By applying mortar evenly, you create a smooth surface for the tiles to stick to securely. This step is crucial for a professional finish.
Place Tiles Carefully
Carefully press each tile into the mortar bed, ensuring they are aligned correctly with spacers for consistent spacing.
Placing tiles carefully ensures a neat and uniform appearance for your kitchen backsplash. Take your time to align them accurately.
Use Tile Spacers
Insert tile spacers between each tile to maintain consistent gaps for grout. Adjust them as needed for precise alignment.
Using tile spacers helps you achieve a uniform look and ensures that grout lines are straight and evenly spaced.
Grout and Seal Tiles
Mix Grout Consistently
To mix grout consistently, start by adding water to the powdered grout in a bucket. Stir the mixture until it reaches a smooth, lump-free consistency. Consistency is key to ensure proper adhesion between tiles.
Apply Grout Between Tiles
Applying grout between tiles requires a rubber float held at a 45-degree angle. Press the grout into the spaces, ensuring they are completely filled. Wipe off excess grout with a damp sponge before it dries.
Clean Excess Grout
Cleaning excess grout is crucial for a polished finish. Use a damp sponge to wipe off any remaining grout on the tile surface. Rinse the sponge frequently to prevent smearing excess grout over the tiles.
Seal Tiles for Protection
To seal tiles for protection, allow the grout to cure for 48 hours before applying a penetrating sealer. Use a brush or roller to evenly distribute the sealer over the grout lines. This step helps prevent stains and moisture damage.
FAQs
How Important Is Measuring And Planning Before Installing A New Kitchen Backsplash?
Measuring and planning are crucial to ensure you have the right amount of materials, avoid unnecessary cuts, and achieve a professional finish. By taking accurate measurements and planning the layout beforehand, you can save time and reduce wastage during the installation process.
What Is The Significance Of Preparing The Wall Before Installing A Kitchen Backsplash?
Preparing the wall by cleaning it thoroughly, repairing any imperfections, and applying a suitable primer ensures proper adhesion of the tiles. This step is essential for a durable and long-lasting backsplash that will not peel or crack over time.
Why Is It Necessary To Cut And Pre-Lay Tiles When Installing A Kitchen Backsplash?
Cutting and pre-laying tiles allow you to visualize the layout, make any necessary adjustments, and ensure a precise fit around outlets and corners. This preparation step helps streamline the installation process and minimizes errors during the actual tiling work.
How Important Is The Application Of Mortar And Laying Of Tiles In The Kitchen Backsplash Installation Process?
Properly applying mortar and laying tiles in a systematic manner are critical for ensuring the tiles adhere securely to the wall. This step sets the foundation for a well-installed backsplash that is even, level, and free from air pockets, enhancing both aesthetics and durability.
Why Should One Pay Attention To Grouting And Sealing Tiles After Installing A Kitchen Backsplash?
Grouting fills the gaps between tiles, providing structural support and preventing moisture penetration. Sealing tiles protects them from stains, water damage, and discoloration, prolonging the lifespan of your backsplash while making it easier to clean and maintain its appearance.
Conclusion
Completing your kitchen backsplash can be a rewarding project. Remember to measure accurately, prep the wall well, cut and lay tiles with care, apply mortar correctly, and finish off with precise grouting. Following these steps ensures a professional-looking backsplash that enhances your kitchen’s aesthetics and functionality.
Now that you have the know-how, grab your tools and get started on transforming your kitchen with a stunning new backsplash. Your culinary space awaits a fresh, stylish upgrade!
To benefit from our superior services, contact Pro Services General Contractors at (888) 564-3777 right away.
Contact Pro Services General Contractors today for our amazing remodeling services.
BELOW ARE SOME OF THE MANY HOME INTERIOR SERVICES THAT WE OFFER
-
Kitchen BacksplashKitchen Backsplash
-
Kitchen CabinetsKitchen Cabinets
-
Kitchen CountertopsKitchen Countertops
-
Kitchen FaucetsKitchen Faucets
-
Kitchen LightingKitchen Lighting
-
Kitchen SinksKitchen Sinks
-
Kitchen TileKitchen Tile
-
Bathroom AdditionBathroom Addition
-
Bathroom CabinetsBathroom Cabinets
-
Bathroom FaucetsBathroom Faucets
-
Bathroom SinksBathroom Sinks
-
Bathroom TileBathroom Tile
-
Bathroom VanitiesBathroom Vanities
-
Shower DoorsShower Doors
-
Shower SystemsShower Systems
-
Basement RemodelingBasement Remodeling
-
Crown Moulding / BaseboardsCrown Moulding / Baseboards
-
Dining Room RemodelingDining Room Remodeling
-
Home Office RemodelingHome Office Remodeling
-
Living Room RemodelingLiving Room Remodeling
-
ADUADU
-
Disability / Mobility ADUDisability / Mobility ADU
-
Finished BasementFinished Basement
-
First StoryFirst Story
-
Garage ConversionGarage Conversion
-
Granny FlatGranny Flat
-
Second StorySecond Story
-
Engineered StoneEngineered Stone
-
Engineered WoodEngineered Wood
-
Green FlooringGreen Flooring
-
Hardwood FlooringHardwood Flooring
-
Laminate FlooringLaminate Flooring
-
Natural Stone FlooringNatural Stone Flooring
-
Tile FlooringTile Flooring
-
Kitchen TileKitchen Tile
-
Bathroom TileBathroom Tile
-
Pool TilePool Tile
-
Exterior TileExterior Tile
Related Posts

▷DIY Backsplash Installation: A Step-by-Step Guide In San Diego
DIY Backsplash Installation: A Step-by-Step Guide In San Diego Installing a new kitchen backsplash can seem…

▷6 Steps to Choosing and Installing Your New Kitchen Countertops In San Diego
6 Steps to Choosing and Installing Your New Kitchen Countertops In San Diego Did you know…

▷5 Tips To Install New Bathroom Faucets In San Diego
5 Tips To Install New Bathroom Faucets In San DiegoLooking to upgrade your bathroom? Installing…

▷5 Benefits of Remodeling Your Living Room In San Diego
5 Benefits of Remodeling Your Living Room In San Diego Did you know that on average,…

▷5 Practical Tips for Combining Kitchen and Dining Rooms in Your Remodel In San Diego
5 Practical Tips for Combining Kitchen and Dining Rooms in Your Remodel In San Diego Embarking…

▷Tips to Measure and Install Shower Doors: A Step-by-Step DIY Guide In San Diego
Tips to Measure and Install Shower Doors: A Step-by-Step DIY Guide In San Diego Did you…

▷Ways to Remove and Install Bathroom Vanity Cabinets In San Diego
5 Reasons to Increase Your Home Value with Basement Remodeling In San Diego Did you…

▷5 Reasons to Increase Your Home Value with Basement Remodeling In San Diego
5 Reasons to Increase Your Home Value with Basement Remodeling In San Diego Did you know…
